How To Get Orange Peel Out Of Single Stage Paint?
How To Get Orange Peel Out Of Single Stage Paint? Orange peel is a common problem that can occur when painting with single-stage paint. It refers to a bumpy, textured appearance on the surface of the paint, resembling the skin of an orange.
To remove orange peel from single-stage paint, wet sanding with the appropriate grit sandpaper is recommended. For light orange peel, use a 1500-grit sandpaper, for medium orange peel, use a 1000-grit sandpaper, and for heavy orange peel, use a 500-grit sandpaper.
Be gentle while sanding to avoid over-sanding into the paint. After sanding, polish the surface to restore it to its original appearance.
In this article, I’ll discuss some effective methods to get orange peel out of single stage paint.
What is Single Stage Paint?
Before we dive into the methods of removing orange peel from single stage paint, let’s first discuss what single stage paint is.
Single stage paint is a type of paint that combines the base coat and clear coat in one application.
It’s a popular choice for automotive and industrial applications because it’s easy to apply and dries quickly. However, it’s also prone to orange peel, which can be frustrating.
How to Get Orange Peel Out of Single Stage Paint?
If you’ve ever painted a car or any other object with single stage paint, you may have noticed that it’s not always easy to get a smooth finish. Orange peel is a common problem that can occur when you apply single stage paint.
Orange peel is a textured surface that looks like the skin of an orange. It can be caused by various factors, including improper spray gun technique, incorrect air pressure, and incorrect paint viscosity.
Method 1: Wet Sanding
Wet sanding is one of the most effective methods of removing orange peel from single-stage paint. Wet sanding involves using sandpaper with fine grit and water to sand the surface of the paint.
Wet sanding helps to prevent the sandpaper from clogging and also helps to keep the surface cool, which prevents the paint from melting.
Step 1: Choose the Right Grit Sandpaper
The first step in wet sanding is to choose the right grit sandpaper. The grit of the sandpaper determines how coarse or fine it is. For light orange peel, use a 1500-grit sandpaper.
For medium orange peel, use 1000-grit sandpaper. For heavy orange peel, use a 500-grit sandpaper. You can also use a sanding block to help you sand evenly.
Step 2: Wet the Surface
The next step is to wet the surface of the paint. You can use a spray bottle or a hose to wet the surface.
The water helps to lubricate the sandpaper and prevent it from scratching the paint. It also helps to keep the surface cool.
Step 3: Sand the Surface
Once you have the right grit sandpaper and have wet the surface, it’s time to start sanding. Start by sanding the surface in a circular motion, applying light pressure.
Be gentle to avoid over sanding into the paint. Check your progress frequently to avoid sanding too much in one area.
Step 4: Rinse the Surface
After sanding, rinse the surface with water to remove any sanding residue. You can use a hose or a spray bottle to rinse the surface. Make sure to remove all the sanding residue before moving on to the next step.
Step 5: Dry the Surface
Once you’ve rinsed the surface, dry it with a clean towel or a microfiber cloth. Make sure to dry the surface completely before moving on to the next step.
Method 2: Polishing
After wet sanding, the surface of the paint may look dull. Polishing is the next step to restore the surface to its original appearance. Polishing helps to remove any scratches or marks left by the sandpaper and also helps to bring out the shine in the paint.
Step 1: Choose the Right Polish
The first step in polishing is to choose the right polish. There are many different types of polish available, including rubbing compound, polishing compound, and finishing polish.
Rubbing compound is the most aggressive and is used to remove deep scratches and defects. The polishing compound is less aggressive and is used to remove light scratches and swirl marks. Finishing polish is the least aggressive and is used to bring out the shine in the paint.
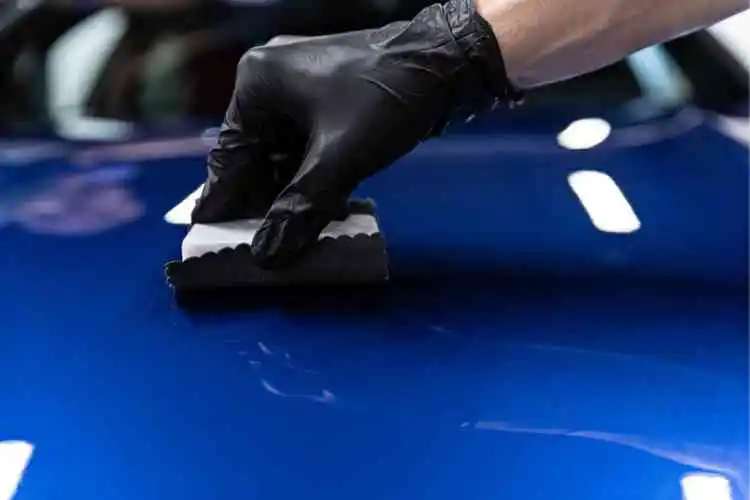
Step 2: Apply the Polish
Once you’ve chosen the right polish, apply it to the surface of the paint. You can use a foam pad or a microfiber cloth to apply the polish. Apply the polish in a circular motion, working in small sections at a time. Apply light pressure and be careful not to apply too much polish.
Step 3: Buff the Surface
After applying the polish, buff the surface with a clean microfiber cloth. Buff the surface in a circular motion, applying light pressure. Make sure to remove all the polish residue before moving on to the next section.
Step 4: Repeat if Necessary
If the surface of the paint still has orange peel after wet sanding and polishing, you may need to repeat the process. You can start by wet sanding again with a finer grit sandpaper and then polishing again. Repeat the process until you are satisfied with the results.
Method 3: Using a Paint Correction System
If wet sanding and polishing don’t work, you may need to use a paint correction system. A paint correction system is a set of products that are designed to remove defects from the surface of the paint. These systems are usually used by professionals, but they can also be used by DIYers.
Step 1: Choose the Right Paint Correction System
The first step in using a paint correction system is to choose the right system. There are many different systems available, including compounds, polishes, and waxes. Compounds are the most aggressive and are used to remove deep scratches and defects. Polishes are less aggressive and are used to remove light scratches and swirl marks. Waxes are the least aggressive and are used to protect the surface of the paint.
Step 2: Apply the Compound
Once you’ve chosen the right paint correction system, apply the compound to the surface of the paint. You can use a foam pad or a microfiber cloth to apply the compound. Apply the compound in a circular motion, working in small sections at a time. Apply light pressure and be careful not to apply too much compound.
Step 3: Buff the Surface
After applying the compound, buff the surface with a clean microfiber cloth. Buff the surface in a circular motion, applying light pressure. Make sure to remove all the compound residue before moving on to the next section.
Step 4: Apply the Polish
After buffing the surface, apply the polish to the surface of the paint. You can use a foam pad or a microfiber cloth to apply the polish. Apply the polish in a circular motion, working in small sections at a time. Apply light pressure and be careful not to apply too much polish.
Step 5: Buff the Surface
After applying the polish, buff the surface with a clean microfiber cloth. Buff the surface in a circular motion, applying light pressure. Make sure to remove all the polish residue before moving on to the next section.
Step 6: Apply the Wax
After buffing the surface, apply the wax to the surface of the paint. You can use a foam pad or a microfiber cloth to apply the wax. Apply the wax in a circular motion, working in small sections at a time. Apply light pressure and be careful not to apply too much wax.
Step 7: Buff the Surface
After applying the wax, buff the surface with a clean microfiber cloth. Buff the surface in a circular motion, applying light pressure. Make sure to remove all the wax residue before moving on to the next section.
Tips for Removing Orange Peel from Single Stage Paint
- Start with the least aggressive method: – If you’re not sure how severe the orange peel is, start with the least aggressive method first. For example, if you’re not sure whether to use a 1500-grit or a 1000-grit sandpaper, start with the 1500-grit sandpaper.
- Use the right tools: – Make sure you have the right tools for the job, including sandpaper, a sanding block, a spray bottle, and a microfiber cloth.
- Be patient: – Removing orange peel from single stage paint can be time-consuming. Be patient and take your time to ensure you get the best results.
- Check your progress frequently: – Check your progress frequently to avoid sanding or polishing too much in one area.
- Use a test panel: – If you’re not sure how a particular method will work, use a test panel first. This will help you avoid damaging the entire surface of the paint.
Conclusion
Removing orange peel from single stage paint can be challenging, but it’s not impossible. Wet sanding, polishing, and using a paint correction system are all effective methods of removing orange peel from single stage paint.
Remember to choose the right grit sandpaper, use the right tools, and be patient. With a little bit of effort, you can restore the surface of your paint to its original appearance.