How to Get Swirls Out of Car Paint? Complete Guide
Introduction How to Get Swirls Out of Car Paint
Even well-maintained cars can seem old and drab with swirls on the paint. You’re not alone in wanting to remove those annoying circle markings. This is a regular problem for automobile owners following incorrect cleaning or abrasion. Nothing to worry about—it’s fixable!
This tutorial covers all aspects of removing swirls from automotive paint. What causes swirls and how to avoid them will also be discussed. Let’s start with the simplest and most effective ways to restore your car’s shiny, smooth appearance.
Why Do Swirls Appear on Car Paint?
Fine scratches might show on your car’s paint as swirls. They often come from inappropriate cleaning practices, such as using a filthy towel, drying the vehicle in circles, or utilizing an automated car wash with old brushes. These microscopic scratches grow more obvious with time, particularly in strong light.
Let’s look at what causes them:
| Cause | Explanation | Prevention Tip |
| Improper washing methods | Washing with dirty sponges or towels can cause fine scratches. | Use microfiber towels and clean mitts. |
| Automatic car washes | Brushes in older car washes can leave marks. | Opt for touchless washes or wash by hand. |
| Drying techniques | Drying in circular motions spreads tiny dirt particles, leading to swirl marks. | Dry in straight lines using a microfiber drying towel. |
| Using abrasive products | Some polishers and waxes contain harsh chemicals that can cause damage. | Choose products labeled as “safe for clear coat finishes.” |
After learning what creates swirls, let’s remove them and polish your automobile.
Step 1: Wash Your Car Properly
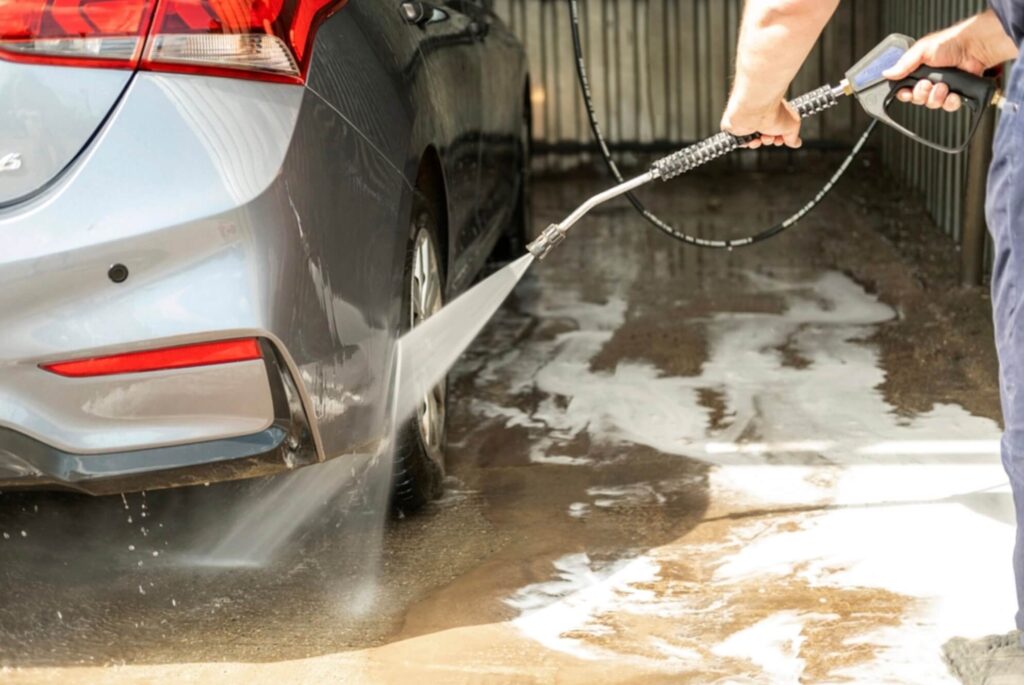
Start fresh before eliminating swirls. To avoid rubbing in dirt or particles that might worsen the issue, wash your automobile completely. But be careful washing your automobile the incorrect way could generate swirls!
What You’ll Need:
- Two buckets (one for soap, one for rinsing)
- High-quality car wash soap
- Microfiber wash mitt
- Grit guards (to place in the bottom of the buckets)
- Hose or pressure washer
Steps:
- Rinse the car: Start by rinsing off loose dirt with water. This helps prevent scratching when you begin washing.
- Use the two-bucket method: One bucket should be soapy and the other plain. Dip your microfiber mitt in soap, wash a vehicle piece, rinse it in plain water, and return to the soapy bucket.
- Wash from top to bottom: Begin with the roof and work your way down. This prevents dirt from spreading to cleaner areas.
- Rinse and dry properly: Rinse off all soap and dry with a microfiber towel, moving in straight lines.
Tip: Adding a grit guard to the bottom of your bucket ensures dirt sinks to the bottom, keeping your mitt clean and reducing the risk of new swirls.
Step 2: Use a Clay Bar to Remove Contaminants
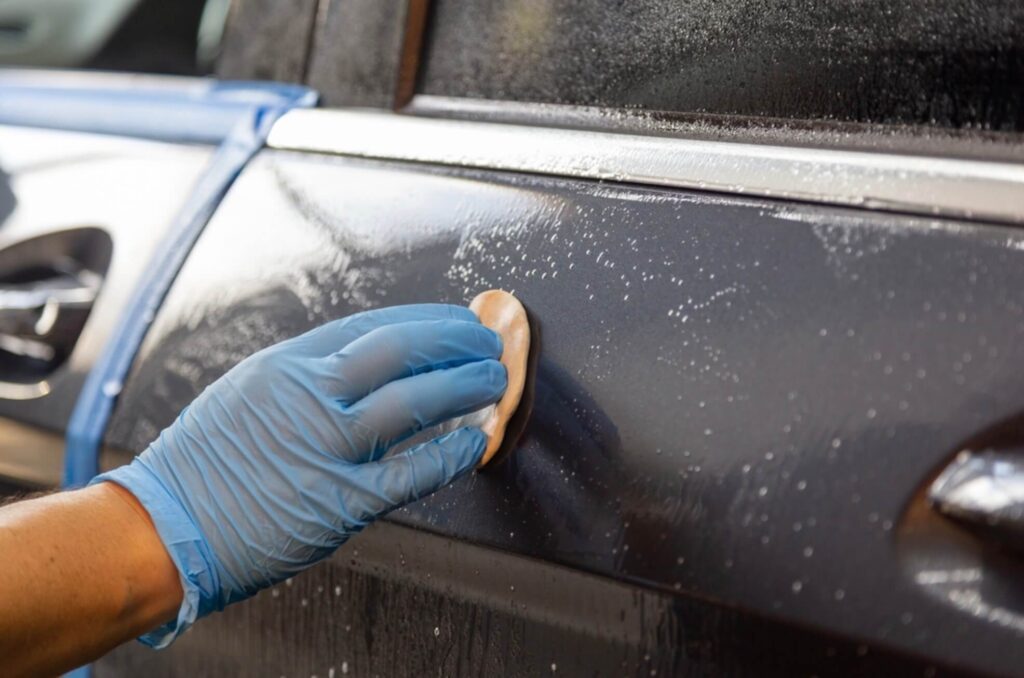
After a thorough wash, tiny particles remain on your automobile. Swirl removal requires eliminating these pollutants with a clay bar to avoid additional damage.
What You’ll Need:
- Clay bar kit (comes with a clay bar and lubricant)
- Microfiber cloth
Steps:
- Lubricate the surface: Spray the lubricant on a small section of the car.
- Rub the clay bar gently: Move the clay back and forth over the lubricated area. You’ll feel it start to glide smoothly as it picks up contaminants.
- Wipe and inspect: Use a clean microfiber cloth to wipe the area clean and inspect the surface. It should feel smooth to the touch.
- Repeat: Continue this process over the entire car.
Advantages of Using a Clay Bar
| Advantage | Explanation |
| Removes deep contaminants | Safely lifts embedded dirt that washing alone can’t remove. |
| Prepares surface for polish | Ensures the paint is completely clean, making polishing more effective. |
| Leaves paint smooth | Makes the surface silky smooth, ensuring a flawless polish. |
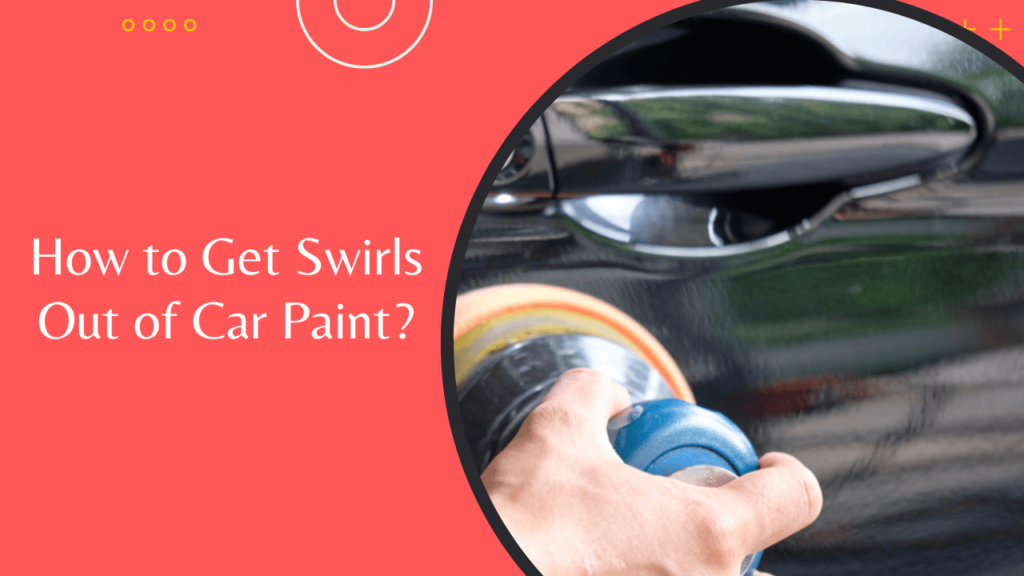
Step 3: Choose the Right Polish or Compound
Once your car is fully clean, the next step is to polish the paint to remove swirls. Choosing the right polish or compound is critical. If the swirls are light, a mild polish will do the job. For deeper swirls, you can need to use a cutting compound first, followed by a finer polish to restore shine.
What You’ll Need:
- Dual-action (DA) polisher or hand applicator
- Cutting compound (for deep swirls)
- Polishing compound (for light swirls)
- Foam pads (one for cutting, one for polishing)
Steps:
- Apply the compound: Apply a small amount of cutting compound to your foam pad.
- Work in sections: Using a DA polisher, work in 2×2 foot sections, moving in overlapping straight lines. This ensures even coverage and avoids creating new swirls.
- Buff with a clean microfiber cloth: After working each section, use a microfiber cloth to buff off any residue.
- Switch to polish: Once you’ve finished with the cutting compound, switch to a polishing compound to restore the car’s gloss.
Tip: If you’re doing this by hand, make sure to use consistent pressure and straight-line motions.
Comparing Polishes and Compounds
| Product Type | When to Use | Ease of Use |
| Cutting compound | For deeper scratches and more pronounced swirl marks. | Requires a DA polisher for best results. |
| Polishing compound | For light swirl marks and to restore gloss after using a cutting compound. | Can be used by hand or with a DA polisher. |
| All-in-one polish | Great for mild swirls and restoring shine in one step. | Easy to use, but not as effective on deeper swirls. |
Step 4: Wax and Seal for Long-Lasting Protection
Protect your hard work now that your automobile looks virtually perfect. Waxing or sealing your automobile will shine and avoid swirl marks. Consider it a barrier that shields your paint from pollutants and UV radiation.
What You’ll Need:
- High-quality car wax or paint sealant
- Microfiber applicator pad
- Clean microfiber towels
Steps:
- Apply the wax/sealant: Use a microfiber applicator pad to apply a thin coat of wax or sealant to the automobile in tiny portions.
- Allow it to dry: Follow product recommendations and let wax or sealant haze.
- Buff to a shine: Remove the haze with a clean microfiber cloth for a glossy finish.
Tip: Always apply wax or sealant in straight lines and avoid circular motions to prevent new swirls.
Wax vs. Sealant
| Product | Advantage | Durability |
| Carnauba wax | Provides a deep, warm shine and is easy to apply. | Lasts around 3-4 months. |
| Synthetic sealant | Offers longer-lasting protection and is more resistant to weather and contaminants. | Lasts 6-12 months, depending on conditions. |
Step 5: Prevent Future Swirl Marks
Now that your automobile is swirl-free and beautiful, prevent those annoying blemishes from returning. Prevention is simpler than repair, and a few lifestyle modifications can keep your car’s paint in great shape.
Final Words
Swirls in automobile paint can be removed easily. With the correct equipment, methods, and supplies, it’s easy to enhance your car’s look. First wash, then clay bar, polish swirls, then finish with wax or sealer. Prevention is the greatest method to avoid swirls.