How To Paint Over Chrome Plastic?
If you want to update the appearance of your vehicle, painting over metallic plastic parts can be an excellent choice. However, painting over chrome can be difficult due to chromium’s smooth and slippery surface, which is not conducive to paint adhesion.
How To Paint Over Chrome Plastic? To paint over chrome plastic, start by carefully removing the parts and cleaning them thoroughly. Next, gently scuff the surface and apply an adhesion promoter to help the paint adhere. From there, follow the steps for painting and applying a clear coat to achieve a professional-looking finish.
In this article, I’ll share some tips and techniques on how to properly paint over chrome plastic and achieve a long-lasting finish.
How To Paint Over Chrome Plastic: A Step-by-Step Guide
Painting over chrome can be difficult since the paint will not stick to the smooth, shining surface. But don’t worry, you can successfully paint over chrome plastic and achieve the desired look with a few simple steps.
Step 1: Clean the Surface
Before you start painting, it’s crucial to clean the surface thoroughly. Any dirt or oil residue can prevent the paint from adhering properly. Start by washing the chrome plastic parts with soap and water, then dry them with a clean cloth.
Next, use a degreaser to remove any oil residue. Mud and dirt should clean easily, but what you really want to make sure you remove is any oil residue.
Step 2: Scuff the Surface
The next step involves gently scuffing the chrome layer to be painted over. You don’t want to rub through this layer, but you do want to prepare the surface to receive a coat of primer.
You can use a fine-grit sandpaper or a scuff pad for this step. Be sure to scuff the surface evenly and thoroughly, so the primer will adhere well.
Step 3: Apply a Coat of Primer
Once the surface is clean and scuffed, it’s time to apply a coat of primer. The primer will help the paint adhere to the surface and prevent it from chipping or peeling.
Choose a primer that’s specifically designed for plastic surfaces, as these will adhere better than general-purpose primers.
You can apply the primer with a spray can or a paintbrush, but be sure to follow the manufacturer’s instructions for the best results.
Step 4: Sand the Primer
You must softly sand it with fine-grit sandpaper after the primer has dry. This will prepare the surface for the paint by removing any rough patches.
Be sure to wipe the surface clean with a tack cloth after sanding to remove any dust or debris.
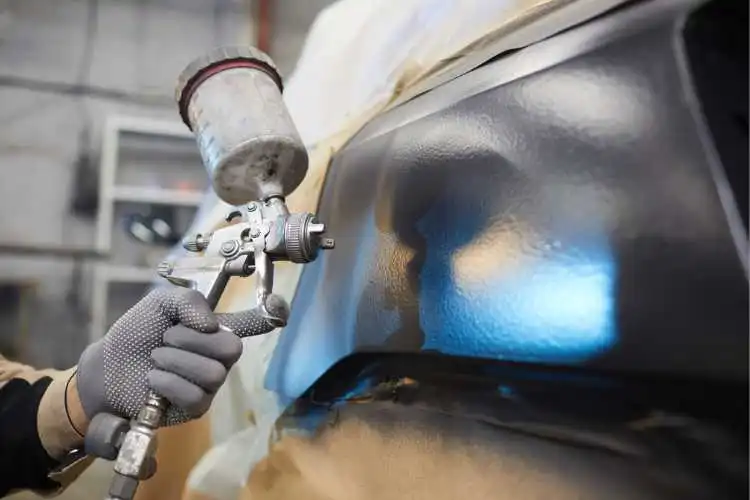
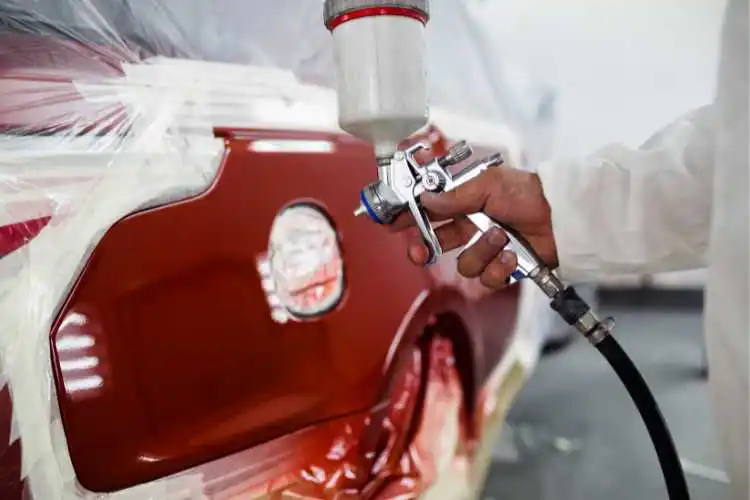
Step 5: Apply the Paint
Now it’s time to apply the paint. Choose a paint that’s specifically designed for plastic surfaces, as these will adhere better than general-purpose paints.
You can apply the paint with a spray can or a paintbrush, but be sure to follow the manufacturer’s instructions for the best results.
Apply the paint in thin, even coats, allowing each coat to dry completely before applying the next one. It’s better to apply several thin coats than one thick coat, as this will help prevent the paint from running or dripping.
Step 6: Let It Dry
After applying the final coat of paint, allow it to cure thoroughly. Depending on the sort of paint selected, this could take several hours or even an entire night.
Be sure to wait until the paint is completely dried before touching or manipulating the parts, as doing so may cause the paint to smudge or peel.
Step 7: Apply a Clear Coat
Applying a clear coat will protect the paint and give it a shiny appearance after it has fully dried.
Choose a clear coat that’s specifically designed for plastic surfaces, as these will adhere better than general-purpose clear coats.
Apply the clear coat in thin, even coats, allowing each coat to dry completely before applying the next one.
Step 8: Let It Dry Again
After you’ve applied the final coat of clear coat, let it dry completely. This can take several hours or even overnight, depending on the type of clear coat you’ve used.
Be sure to let the clear coat dry completely before touching or handling the parts, as this can cause the clear coat to smudge or peel.
Conclusion
Painting over chrome plastic can be a challenging task, but with the right tools and techniques, you can achieve the look you want.
Remember to clean the surface thoroughly, scuff it lightly, apply a coat of primer, sand the primer, apply the paint in thin, even coats, let it dry completely, apply a clear coat, and let it dry again.